
SonarQube is a free, open-source platform for automated code reviews and static code analysis. It can be used to:
- Find bugs
- Code smells
- Vulnerabilities in security
- Concentrate on quality
Integrating SonarQube with Azure DevOps lets you keep your Azure DevOps repositories secure and of high code quality.
Both Azure DevOps Server and Azure DevOps Services are
compatible with it.
With the aid of this integration, you can:
- To quickly build up SonarQube projects, import your Azure DevOps repositories into SonarQube.
- Use Azure Pipelines to analyze projects and incorporate analysis into your build process.
- To determine whether it is safe to integrate your changes, view the results of your Quality Gate and code metrics directly in Azure DevOps.
Step 1
The first step is to launch a Windows virtual computer.
Step 2
Then, install SonarQube on the computer in step two.
We have two choices here:
- Either way, we can set up SonarQube on our personal computers.
- Or you might use the sonar cloud public SonarQube hosted solution.
We will be using the first one.
Step 3
Click the link for downloading the zip file for SonarQube
Community Edition.
Step 4
After downloading and extracting the file, open the
StartSonar.bat file in the directory listed below.
Step 5
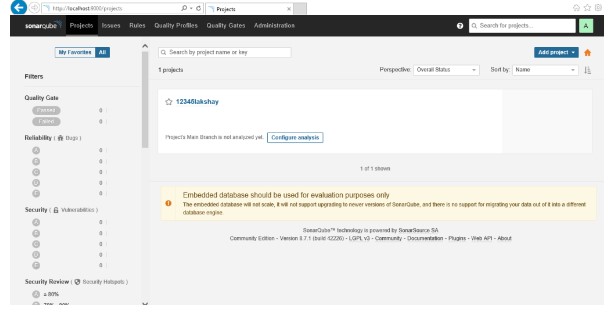
After completing the previous step, access the dashboard by
typing http://localhost:9000 into your browser.
Step 6
For the Azure DevOps agent to connect to our virtual machine
and access port 9000, which is open by default, we must now
open this port. By enabling this port, you will have access
to the SonarQube dashboard using the public IP of the
computer on which SonarQube was set up.
Step 7
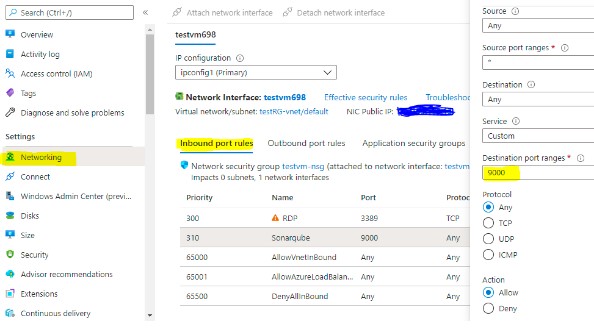
Some steps to open the port in the machine-
Click on “Networking,” Choose “Inbound
Rule,” “Add Inbound Rule,” and then
“Fill in the Details.” You should be competent
to access the dashboard in your browser by typing HTTP:
public IP of the machine>:9000 into your address bar.
Step 8
Everything is set at this point. The construction of our CI
pipeline can begin.
Step 9
Visit your Azure DevOps project and accept a blank
job.
The following phase will involve adding SonarQube tasks to
the pipeline.
Here we have used the Maven POM.xml file in Azure Repos as
source code. Take your own, then go with that.
Alternatively, you can use.NET C# code. In that situation,
the pipeline configuration will be somewhat altered, as I
will explain in subsequent sections.
Step 10
Let’s begin constructing the CI pipeline.
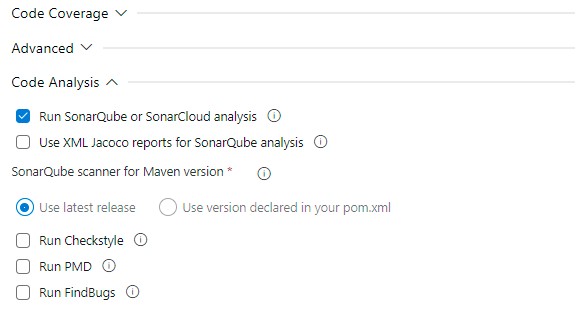
Add Prepare analysis as a task in the pipeline for
SonarQube.
Before beginning the construction, this step configures the necessary settings. It functions as a sort of pipeline initialization for SonarQube.
Step 11
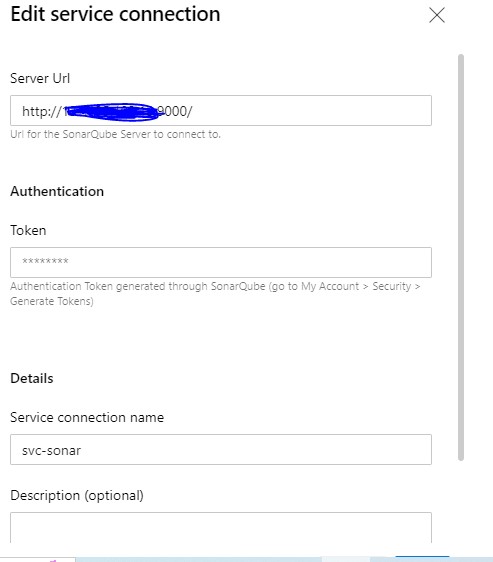
Server endpoint for SonarQube:
You must establish a service connection between SonarQube
and the Azure DevOps agent. You must send the authentication
token and server URL (http://public IP of virtual
machine>:9000).
(In the SonarQube dashboard, select My Account > Security >
Generate Tokens)
We must add a firewall rule to the network of our Azure VM so that port 9000 can be used. The configuration of your infrastructure and network will affect this stage. However, the basic idea should not change. This step may alter if you are installing SonarQube on an on-premises server; however, if a firewall protects the server, you will need to open a port for SonarQube in the firewall. Now, depending once more on your network configuration, we can try visiting the SonarQube via the private IP address or the public IP address of the VM.
- Decide how to do the analysis:
- “Integrate using Maven or Gradle” is the course we chose.
- You can select the “Integrate with MS Build” option if you have a C# code.
- Leave the remaining fields set to default.
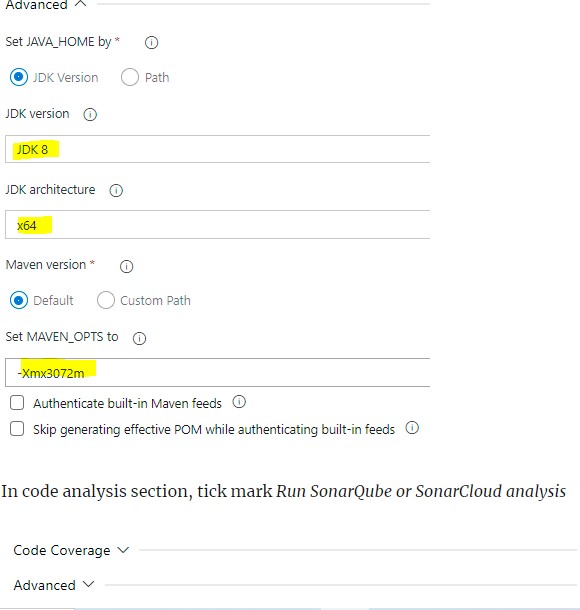
- Streamline the Maven POM.xml task.
- Again, we have utilized this job because my code is in a POM.xml file. The assignment you choose will rely on your coding.
The following information must be provided for this
task:
Maven offers a built-in distribution and deployment process
for the target project. Each phase consists of a series of
goals, each in charge of a different duty.
We used the goal “test.”
Step 12
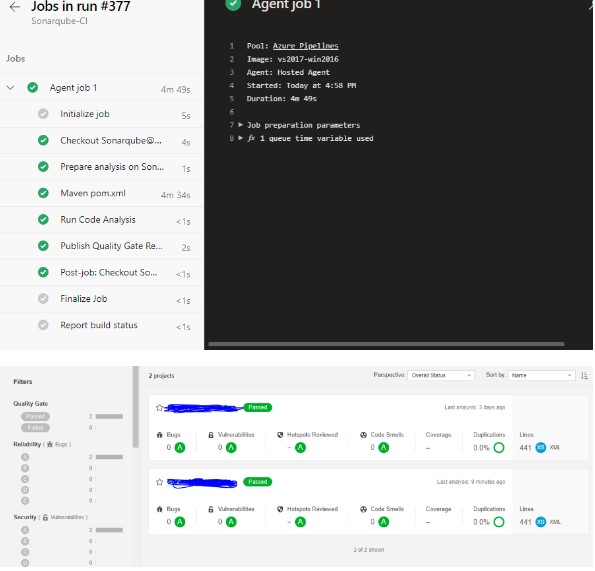
In the Azure DevOps pipeline, add SonarQube code
scanning.
It’s straightforward to incorporate SonarQube code
quality and security scanning for your codebase thanks to
the SonarQube azure DevOps marketplace extension.
Conclusion
Integrating SonarQube with Azure DevOps Server allows you to keep your Azure DevOps Server repositories secure and of high code quality. The above steps will provide you with aid when integrating SonarQube with Azure DevOps.

 Workshop
on Certified DevOps Foundation
 Workshop
on Certified DevOps Professional
 Get
DevOps Certified